End of May Hat & Handspun Scarf

Friday, November 27, 2009

end of may hat

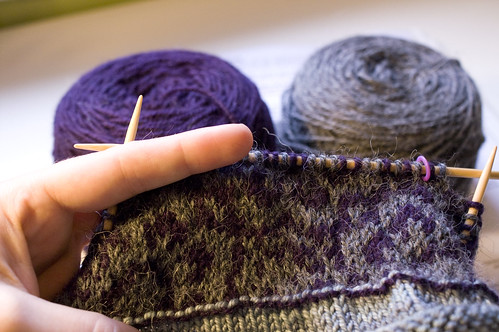
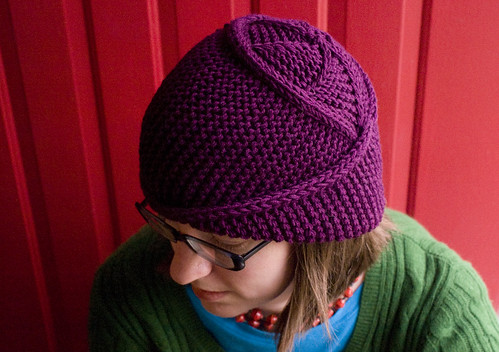
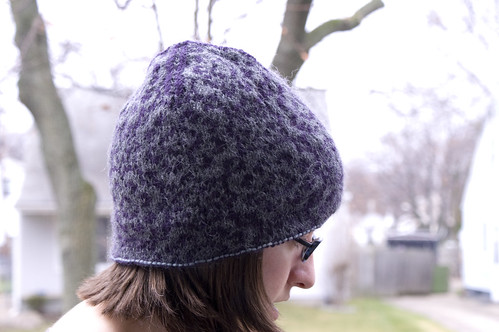
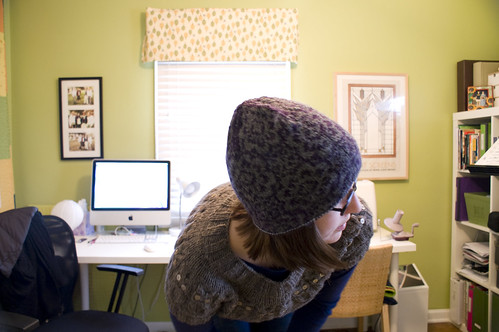
I finished up the End of May hat on Monday night. This project was so much fun and I'm officially addicted to stranded knitting. I've got lots of yarn left over, so I will be making the matching mittens to go along with the hat.


end of may hat


Here's the details:


Pattern: End of May Hat by Zig Zag Stitch


Yarn: Berocco Ultra Alpaca


Needles: US4


Size: Large (next time I will do the smaller size and use size 3 needles)


Notes: I guess I had some gauge issues with this hat, because it turned out a
tad too big for my head (width and lengthwise). I remedied the
situation by tossing it in the dryer for 10 minutes. The hat fits much
better now and doesn't cover my eyes when I pull it down all the way.


Rav link: craftr's End of May


I've been trolling Ravelry for fun colorwork patterns now that I can officially add colorwork as one of my knitting skills. I discovered SpillyJane Knits through a Ravelry ad last year and now I'm ready to take the plunge to make up some of her cute mitten patterns. My favorites are the Swedish Fish Mittens and the Carrots and Beets Mittens.


stash for Ravelry

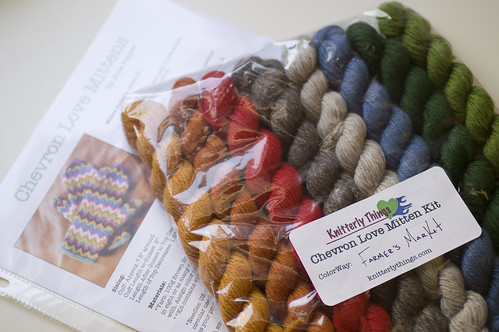
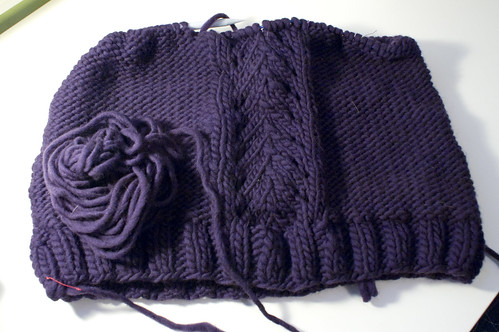
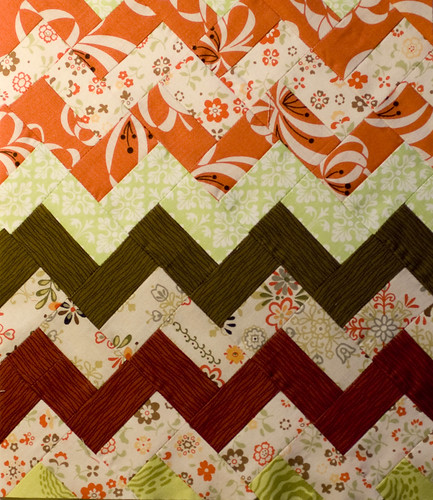
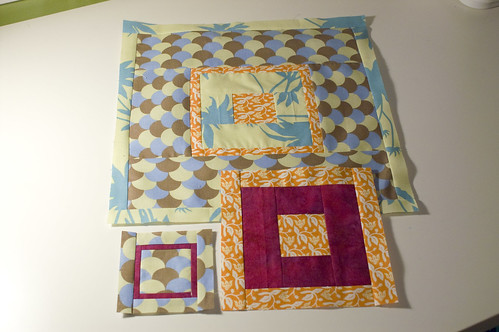
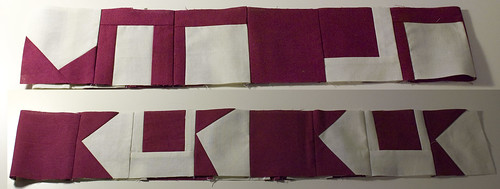
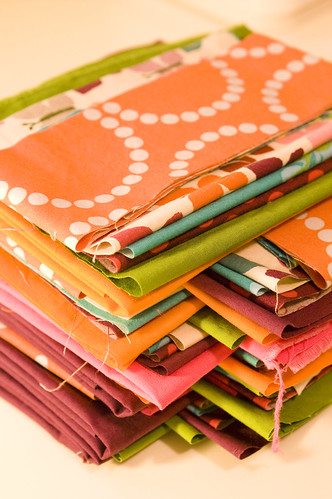
Before I stock up on fingering weight yarn and tiny needles, I plan to make the Chevron Love Mittens with this Farmer's Market Kit that I bought last winter. It hurts me a little to wind up these cute little hanks of yarn into balls, but I've got to bite the bullet, right?


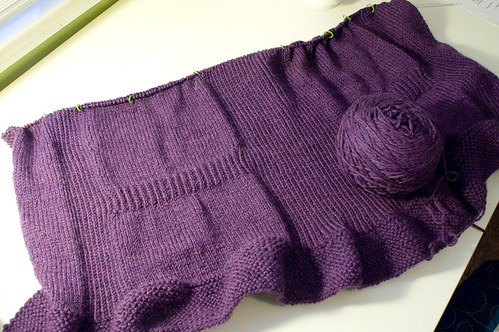
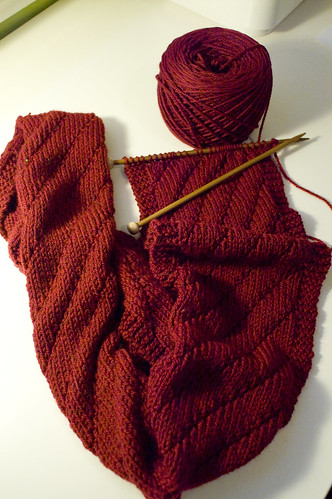
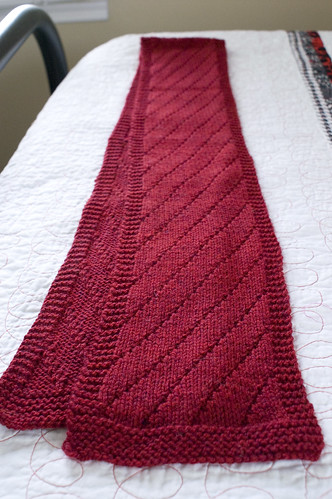
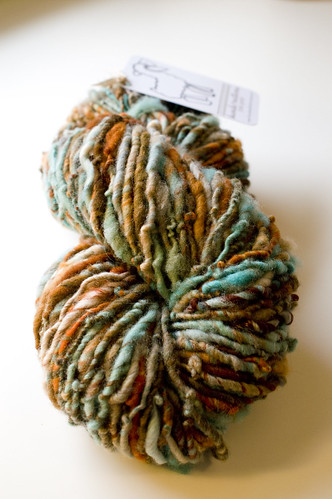
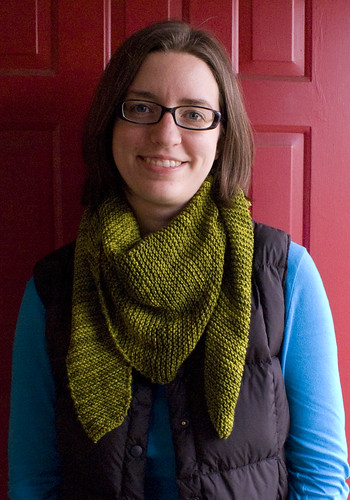
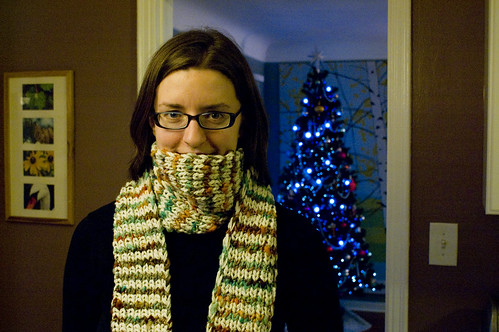
I also finished this scarf made out of the handspun that I bought last Saturday. I based it loosely on the Noro Striped Scarf pattern.


striped scarf with handspun

Here's the Details:


Yarn: Handspun by hands + notions (130 yards of wool locks, silk and alpaca)


 Takhi Sedona in off white (2 skeins held doubled)


Needles: Size 10.5


Pattern: Cast on 17 stitches. K1p1 alternating between 2 rows of natural yarn and 2 rows of handspun yarn, slipping the first stitch of each row.


Size: 5 inches by 84 inches


Notes: The Sedona yarn was really great to work with. It's a nubby thick worsted and really soft. I'd definitely use it again. Now, I think I'm a little hooked on handspun yarn. I will be desperately trying to keep myself from picking up another hobby. Wish me luck!


Rav link: craftr's Handspun Scarf


• • •


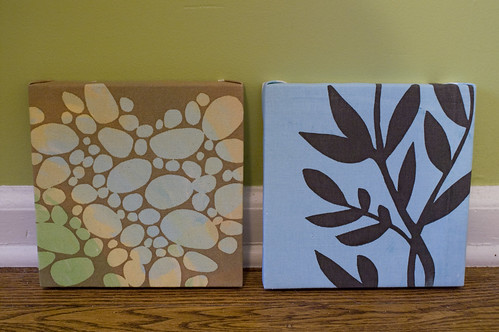
We had a very productive day at our house! We cleaned it from top to bottom (including the fridge!) and we put up all of our Christmas decorations.


Christmas decorations are up!

Bring on the hot chocolate and Christmas tunes on repeat for the next month!


Happy Thanksgiving!

Thursday, November 26, 2009

We're leaving soon to head to my grandparents' house for Thanksgiving dinner. The butternut squash and sourdough stuffing are baking away as I type.


I love Thanksgiving dinner and I love stuffing...I would eat it every day if I could. Here's my all time favorite stuffing recipe:


Sourdough bread stuffing


Sourdough Stuffing


Ingredients


1-pound loaf sourdough bread


8 tablespoons non-dairy butter
(I use Earth Balance)


10 ounces cremini mushrooms,
sliced 1/2-inch thick in both directions


Salt and freshly ground pepper


4 stalks celery, halved
lengthwise and sliced


1 medium onion, chopped


10 sprigs fresh thyme, leaves
stripped from the stems


12 fresh sage leaves, chopped


3 1/2 cups vegetable broth


3 tablespoons chopped Italian
parsley leaves


Directions


Preheat the oven to 350 degrees
F. Grease a 2-quart baking dish and set aside.


Cut or tear the bread into
1-inch cubes and spread it evenly on 2 baking sheets. Toast the bread in the
oven until completely dry and beginning to crisp and brown, about 20 minutes.
Transfer to a large mixing bowl.


Melt 2 tablespoons of the butter
in a large skillet over medium-high heat. Add the mushrooms and a few pinches
of salt and saute, stirring occasionally, until golden brown, about 6 to 8
minutes. Add celery, onion, 2 tablespoons butter, and thyme. Once the butter
has melted, cook, stirring frequently, until the vegetables have softened,
about 5 minutes. Add sage and remaining 4 tablespoons butter. Add vegetable
broth to skillet and stir to combine. Season with salt and pepper, to taste.


Transfer
toasted bread cubes to a large bowl. Pour the vegetable broth mixture over the
bread cubes and toss to combine until the bread cubes absorb the liquid. Pour
the mixture into the greased baking dish, and sprinkle with parsley. Bake in
the center of the oven until heated through and the top is golden brown, about
40 minutes. Remove the stuffing from the oven and allow to cool about 15
minutes before serving.


Blurb book

Tuesday, November 24, 2009

Europe Blurb Book

I put together a blurb photo book of our Europe trip and finally received the finished product.


I ordered the book from blurb and used their design it yourself templates for Adobe InDesign. This is
the program that I use at work all the time, so I am comfortable with
the software and the templates were very easy to use. The album I made is a 12"x12" hardcover book. I set up each
page with a 3x3 grid of 4-inch blocks and then added and resized my
pictures to fill the blocks. Some photos fill one block and others fill
up to 6 blocks of the page. It was a little overwhelming to fit all of
the pictures in the book, so coming up with a simple grid to use made
the book easy and quick to put together.


Europe Blurb Book

I stuck with one color bar for each city that we visited and added
some of the text from my blog entries and some of my own additional
commentary. Friends and family are having fun playing "spot the typo."
Luckily only two have been found so far!

Europe Blurb Book

Blurb was great to work with. I used Blurb for my parents'
anniversary album earlier this summer. For the Europe book, I used the cover wrap option which turned out nicely. For my parents' album, I used the dust jacket option, which turned out nice too. Here's two tips that I
discovered myself through purchasing two books and through reading
Blurb forums.

1. Don't pay to upgrade from Standard to Premium paper - it's not much of a quality jump to justify the cost.


2. Don't pay $15 extra to remove the blurb
logo from the last page (custom logo option). I was able to tear out the final logo page
myself for free (blank white page with a tiny logo at the bottom
center).

Europe Blurb Book


Europe Blurb Book

Europe Blurb Book

Europe Blurb Book

Europe Blurb Book


For past trips, I have just put photos into 2-up or 3-up albums
and written captions and information. The scrapbooks and photo albums
are starting to take over our house, so getting a photo book like this
printed is a great space saver for the amount of pictures that it can
include. It fits easily on our bookshelf and is only about 1/2" wide.


A coworker of mine has had great success using Walgreens for photo
books, too. She came up with the best idea for creating a yearly album.
She started a new book on January 1 and adds pictures to her online
album layout throughout the year when she has a chance (once or twice a
month). At the end of December, she'll have a complete album with all
of the pictures she's taken this year included in it and won't have to
scramble around to remember what she did or where she misplaced photos
of a certain event. I think I'm going to try this method out for 2010.

on (and off) my needles

Sunday, November 22, 2009

I've been doing lots of knitting lately. It's a great break from
studying and is a lot less of a mess than sewing or quilting, so I
don't have to worry about cleaning up after myself when I pull out the
needles.


As with all of my sweater projects, I tend to get sick of them about
halfway through and want to cast on anything but another sweater, so my
Amelia is waiting in the wings right now until inspiration strikes
again. I still hope to finish it by the end of the year, but I have to
get a couple small projects finished up before I start on it again.


Amelia in progress


My first break from Amelia was for this Red Scarf Project Scarf. I've been in a bit of a purple rut lately, so it was so refreshing to use yarn that is not purple for a bit. The yarn I used for this project is called Shepherd's Wool and it's from Stonehedge Fiber Mill near Traverse City, Michigan. This yarn is Michigan's best kept secret. It's similar to Cascade 220 because it is a solid worsted weight yarn that comes in lots of colors. But, it's 250 yards/skein, is a lot softer than Cascade 220 and is thicker and woollier than Cascade. It's great for felting and it's super soft to wear on your skin.


stash for ravelry


Red Scarf Project


I pulled out my old bamboo needles for this project. They are my first pair of needles and the pair that I learned to knit with and it was fun to use them again. I mainly use my interchangeable circulars for all projects now, but wanted to use these for nostalgia's sake.


Here's the finished scarf:


Red Scarf Project Scarf

Pattern: ScaWiNoNa or Scarf with No Name


Size: 6"x72"


Needle Size: 9


The Red Scarf Projects is taking donations until December 15. Check out their website for details. Thanks, Melissa for spreading the word about this great cause.


Also on the needles are this Big Montana Tunic from the Fall Interweave:


Big Montana Tunic in progress

I was sort of in denial for a while about how this sweater would look on me and then I saw something online about how women with larger chests should not wear sleeveless turtlenecks and it kind of sealed the deal for me. I'll be ripping this one out and starting on a different project. I've got six skeins of this yarn to work with, so I think I'll use most of it to make Wrenna from French Girl Knits. It's a short sleeved cardigan and I think it will work much better with my body type.


End of May Hat

My weekend project has been working on the End of May Hat, this beautiful colorwork pattern from Zig Zag Stitch. I am slowly getting the hang of knitting in both hands and it's been fun to see the pattern progress as I go. I think the yarn that I chose for the project is a bit too close in value, so the colors won't pop individually, but I'll save my final judgment for when the hat is finished.


• • •


prints

Finally, Jon, my sister and I went to the Detroit Urban Craft Fair yesterday. My sister got a stained glass Michigan necklace, Jon and I got a couple of screenprinted designs stretched on canvas from All Things Grow for our offices, and I bought my first skein of hand spun yarn from hands + notions.


handspun

In the words of my sister, "I really like how it smells. It's sort of gross, like sawdust or something, but it smells good to me." I agree. Ahh...the smell of wool! I'm going to pair this yarn with a cream yarn and make a striped scarf similar to the Noro striped scarf. I'm so excited to work with handspun for the first time!


Marie Claire Idées & a craft challenge

Monday, November 16, 2009

Marie Claire Idées


I picked up the September 2009 issue of Marie Claire Idées at a newsstand in Paris (still can't believe that I can say that!). I have loved looking through this issue. The styling is beautiful and there are some really cute projects to try out.


Marie Claire Idées


Marie Claire Idées


Marie Claire Idées


Marie Claire Idées


Marie Claire Idées


Marie Claire Idées


• • •

I don't know if you're like me, but I have a great library of craft idea books that don't get used very often. Is anyone up for a "make-a-project-out-of-an-ignored-but-beautiful-idea-book" challenge? Off the top of my head, I've got a few great books in my stash with projects I'd like to make but have never gotten around to it. The project can be big or small, from a book or magazine, and made for you or as a gift. If you'd like to join, post in the comments and maybe we can report back in a bit with our progress.

edited: Let's plan on making this a challenge to start in January.

51UvdaqZDDL._SS500_


Last Minute Patchwork & Quilted Gifts

51376J4iEfL._SS400_


Weekend Sewing

61klskTIkWL._SS500_

Material Obsession

516uk3YcrzL._SS500_


Stitched in Time


knitting projects

Sunday, November 15, 2009

Here's two knitting projects I finished recently. I've had a busy semester so far and it's been hard to get any crafting done other than knitting lately. These two garter stitch projects were the perfect projects to give my mind a break.


First up is the Quincy Hat from Made in Brooklyn:


Quincy


Pattern: Quincy


Yarn: Filatura Di Crosa Zara Solid


Color: 1706 Eggplant


Yardage: 2.5 balls, yarn held doubled


Needles: 10.5


Notes: This was such a fun pattern to knit. The construction of the hat is genius! I hope to make many more projects from the book soon. It's a soft, thick, and warm hat and a great variation on the typical knit hat.


Ravelry link: craftr's Quincy


Next is the Baktus scarf:


Baktus

Pattern: Baktus


Yarn: The Plucky Knitter Merino Cashmere Nylon Fingering


Color: Bosherton


Yardage: 1 ball, 385 yards


Needles: 10.5


Notes: This project would have been so much more successful if I had a micro scale and weighed the yarn before I started! The basic pattern of the scarf is to cast on 4 stitches increase every four rows until you've used up half your yarn and then decrease every four rows until 4 stitches remain. I knit more than half of the yarn before I started to decrease, so I ended up with less yarn at the end. 


When it started to look like I was going to run out of yarn, I started decreasing one stitch every row until the end. I think that I was able to decrease to about 15 stitches remaining. Then, I ripped (cut) out the cast on row and ripped the beginning of the scarf back until I reached 15 stitches and bound off the original cast on side. The ends of the scarf are no longer pointy, but they are the same width.  They kind of curl up in a point when I wear it, so I'm going with it.


The scarf is nice and warm and perfect for the cooler weather and I absolutely love the color of the yarn, so this project is still a great scarf for me to use. Next time, I'll make sure to weigh the yarn first!


Ravelry link: craftr's Baktus


LivyLou Designs

Thursday, November 12, 2009

Coasters_-_green_diamond

Chris, one of my former coworkers, just started a new blog and online store. I miss hearing about all of her painting, home decorating projects, baking and crafting adventures every day. Work just hasn't been the same without her!

Livylou_0002__Custom_

Rumor has it that she's quite talented in the Christmas tree decorating department, so I'm looking forward to her posts in December (hint, hint, Chris!).

Be sure to check out her blog, Livy Lou Designs and store, LivyLou Designs

 Crayon_Roll-_35


green projects

Wednesday, November 11, 2009

It seems like my big craftwind last week has died down. I managed to
tweak out these two projects before life got the better of me.


new winter pillows for the kitties


First
up is a few cat pillows for around the house. I found this microfleece
blanket for $5 and was able to make 3 pillows out of it (with lots of
leftover fabric) for the cats so I was glad to find such an inexpensive
piece of fabric to use. The pillows are your basic rectangle stuffed
loosely with fiberfill. The cats like to sleep on the floor in front of
our heating vents, so I made two for in front of the vents and one for the couch. (Mental note: buying a dark couch is not such a good idea when you have light colored cats...we are constantly vacuuming fur off the grey surface). As soon as I finished the first pillow and set it
on the floor, NukuNuku jumped off my lap and splayed herself across the
pillow. It's always nice when someone appreciates my work! Even though
we have three pillows, they always seem to be fighting over the use of
whichever pillow the other cat is using.


new winter pillows for the kitties


new quilt top


Nuku Nuku thinks I iron everything too well...she always likes to make sure everything is sufficiently scrunched up.

I also finished my green quilt top. This was modeled after my other
baby quilts (here and here) and the blocks in this quilt are 5" square instead of 2.5"
square. I used 10 fat quarters from the Timeless Treasures Apple
Collection and 3.5 yards of fabric for the top. I was able to cut 12
five inch squares out of each fat quarter, for a total of 120 squares
that were then cut in half. I cut the green fabric into 5" wide strips
and cut out 120 squares from each strip and used the remaining fabric
for a border.

new quilt top

The quilt is 14 blocks wide and 16 blocks tall with a 5" border of sashing around the edge. From my estimates, the quilt is approximately 72x81. I'm not sure how I'm going to quilt this yet. I was thinking about doing some straight line stitching a quarter inch in from each seam to make concentric squares, but I might just stick with basic stippling. Any ideas?


new quilt top

I was planning on giving this away as a gift (I don't think the person reads my blog), but after I told Jon my
intentions, he became very protective of it. Hopefully he'll let me
part with it!


Common threads

Wednesday, November 4, 2009

It's been a while since I've posted all of the blocks I've been making for the Common Threads virtual quilting bee that I'm a part of. Here's what I've made this year:


Block for Oiyi

January: Oiyi


block for Jenny

February: Jenny


block for Lynn

March: Lynn


block for Jacquie

April: Jacquie


Wendy's block

May: Wendy


block for Lisa

June: Lisa


 3727668826_3baa346161_o

Round 2


block for Amber

August: Amber


blocks for Amy

September: Amy


Block for Rossie

October: Rossie


fabric for Rebekah's November blocks

I've got November and I mailed out my fabrics on Monday. I can't wait to see what these ladies come up with for my block theme!


Blogger Template created by Just Blog It