Showing posts with label sewing. Show all posts

sewing room update & a new machine!

Tuesday, April 7, 2015

Updated Craft Room

I’d always dreamed of having a design wall and a counter-height cutting table in the future sewing room of my dreams because I couldn’t figure out how to add them to my current space. After brainstorming for a bit, I came up with a plan that would give me space for a design wall, fabric storage, and a counter sewing and cutting/pressing. In true Rebekah fashion, as Jon says, I came up with this plan on a Thursday and had it all in place and reorganized by Saturday night. Never resting until being fully content is a bit of a problem for me, but it does manifest itself in productivity and finished projects! 

I've had a couple weeks to sew and use my new space and I couldn't be happier with the setup. I was even able to fit an extra temporary table in here so my neighbor, Christina, and I could sew together.


Here’s a few older tours of my room (2010, 2014). I’ve had the same furniture in place for 8 years, but have added craft supplies and moved things around a bit every so often. This time, I moved out my beloved 4x4 Expedit shelf and my long work table in favor of a more flexible layout. This room is small, at about 9 feet by 12 feet, and it’s made even smaller because the door is diagonal and cuts out a bit of space on two walls.


Updated Craft Room

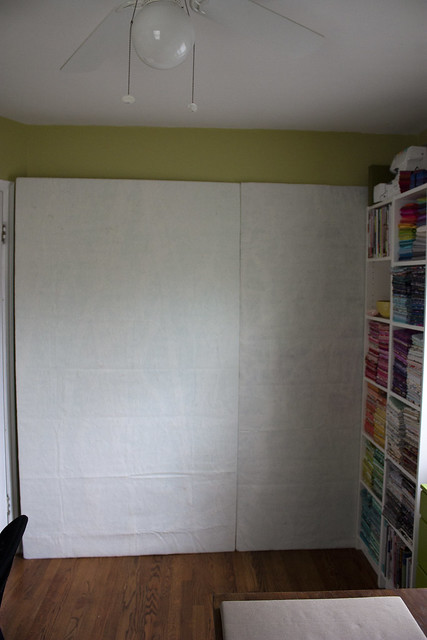
To the left of the door, I placed my new design wall, following Elizabeth Hartman’s design wall tutorial. I ran into a few roadblocks with this. Because I thought my room was 9 feet wide, I assumed that two four feet panels would fit side by side. Unfortunately, the diagonal door chopped off the width a bit so I had to cut off one foot of width from one of the panels. Then, because the two twin batting pieces that I had were only 90” long, I didn’t have enough length of batting to wrap around the full height of the foam, so I cut off a foot from each panel. Now I have two panels that, when stood next to each other, are 7 feet wide and 7 feet high. It's been so nice to have a dog and cat free area to place blocks while the layout and design percolates.


Updated Craft Room

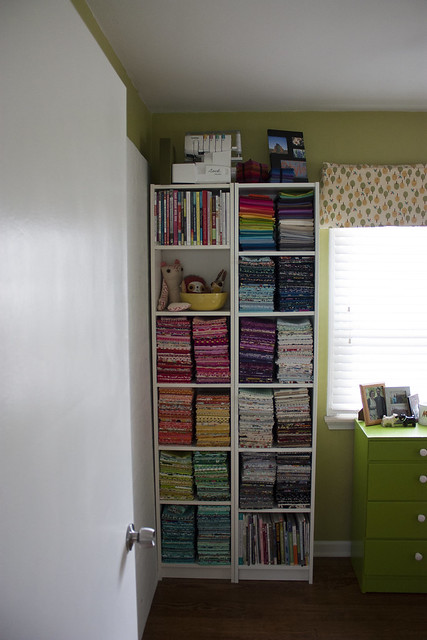
On the next wall, I added another thin Billy shelf and moved all of my fabric and a majority of books to this spot. I pulled the mini green dresser out of my closet to place under the window. It holds office supplies and cross stitch supplies. 


Updated Craft Room

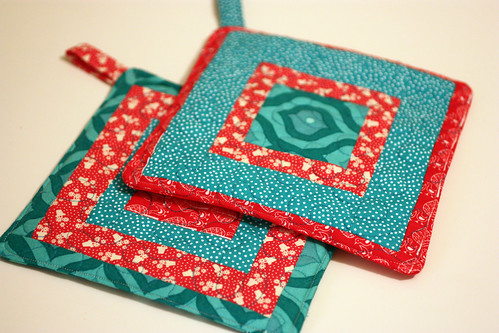
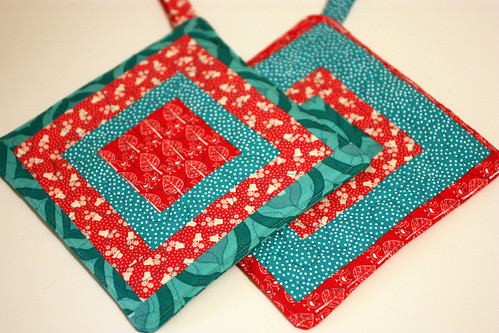
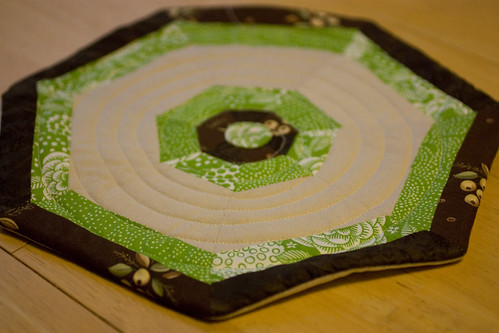
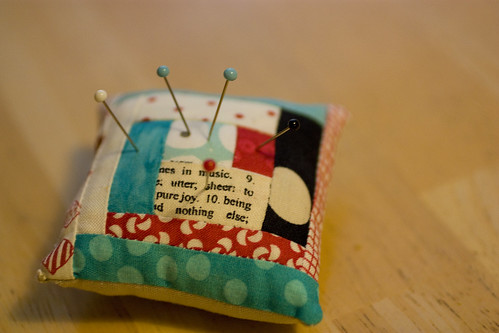
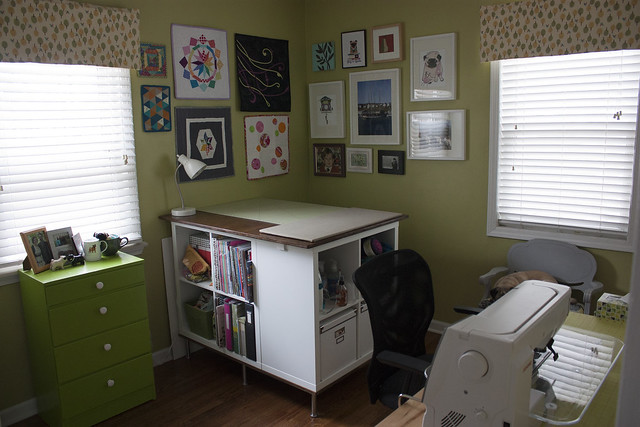
Next up is my glorious new cutting station. Jon and I built this after seeing a few tutorials on IKEA hackers. I used 6” Capita legs for the base (8 in total), then two pieces of hard oak plywood that’s ¾” thick. In between the plywood, there’s three 2x2 Kallax units. Because the Kallax units are updated, thinner versions of the old Expedit shelves, the width of one unit is not the same as the depth of two units put together, so there’s a 1.5” gap on one side of the end shelf. It doesn’t bother me enough to do something about it, but it is a bit annoying. I used a base of 41”x46.5” and a top of 36”x48”, which fits everything well. On top of table, I’m storing my cutting mat and a pressing board that I made following this tutorial. The wall holds my collection of minis from previous doll quilt swaps, guild swaps, and mug rug swaps.


 Updated Craft Room

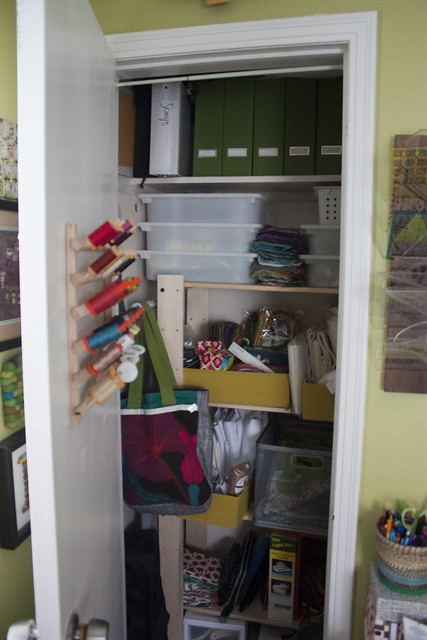
I organized my closet and got rid of some older tools, supplies and magazines that I no longer plan on using. I added a Gorm shelf to hold the rest and added a few more of these Trofast bins (suggested by Rossie) for holding works in progress. The large metal bin in there holds lots of mini projects and embroidery kits that are all cut out and ready to go. Hopefully these will be finished by the end of the year.


Updated Craft Room

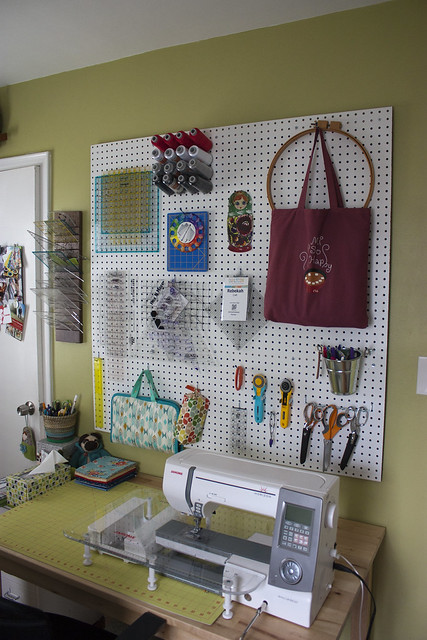
The final wall holds my favorite tools. The old IKEA table I was using was made from separate legs and a base and wasn’t the sturdiest of tables. This table is a little deeper to hold my new sewing machine and does not vibrate at all while I’m sewing. On the new pegboard, I now have a spot for all of my templates and tools. I love sewing gadgets and I love seeing things hung up in front of me to remind me of what I do own, so this is perfect for that.


And speaking of new machines, I bought this Janome Memory Craft 8900 right after Quiltcon at a fantastically low show special from SewVacDirect. I’ve had it for over a month and have already made one quilt from start to finish and four new tops on it. I couldn’t be happier with my choice and feel like I’ve barely scratched the surface of what this can do. I was not expecting to come home with a new machine right after Quiltcon, but I sewed on it for a bit during the last hour of Quiltcon and couldn’t let it go.

Jon's bonsai tool wrap

Sunday, June 26, 2011

Bonsai Tool Wrap
One of Jon's most favorite hobbies is bonsai. He is always fiddling with plants and acquiring new specimens. It's the perfect hobby for him because he is such a patient guy!

He had been begging me to make him a wrap for all of his tools for ages. I knew he was serious when he sent me links to wraps he found online that he liked and dimensions for his dream wrap!


Bonsai Tool Wrap
I made this wrap for him for Christmas and it went together quickly (in 30 minutes!). This project requires:
Twill tape
Backing fabric
Sturdy canvas
Doublefold bias tape

I cut out 2 rectangles of fabric in his desired dimensions (one piece of canvas, one piece of printed cotton). Then I cut out a half rectangle of canvas and lined the top edge with bias tape.
I also cut a smaller rectangle in canvas and lined 3 sides in bias tape for the top flap.
I placed the half piece of canvas over the full piece of canvas and sewed pockets for each tool.
Then I sandwiched the canvas with the fabric and edged it with the bias tape.
To finish it off, I attached a piece of twill tape folded in half on one side of the wrap.

It was a super easy project and I should have made it sooner!

Bonsai Tool Wrap

Pillows!

I've been in a sewing rut much of this year, but I always seem to find inspiration for another project when I attend Brighton Modern Quilters meetings in the Creative Quilt Kits store in Brighton, MI.

Throw Pillows
I loved this Tanis Keefe fabric and had to make two kitty pillow for our basement couch.

Throw Pillows
And, I combined some fun prints to make two pillow for our living room couch. It feels nice to freshen up the place with some simple projects like these!

Mail Sack

I've had the Pink Chalk Studie Mail Sack pattern sitting around in my stash for at least a year now. In an attempt to use what I have, I decided to finally put this together a few months ago.

Mail Sack
The pattern was extremely well written and I was able to put this together in a few hours. I'd definitely recommend it!

Pink Chalk Fabrics Mail Sack/Cat sling

Pink Chalk Fabrics Mail Sack/Cat sling
Now, if only I could walk around the neighborhood with a kitty in tow and not get strange looks!

ornaments

Sunday, November 7, 2010

CraftmeetupbuttonI attended the SE Michigan Crafters Meetup, hosted by Rae of Made-By-Rae last Thursday night. It was so much fun to meet up with other local crafters and work on things with company, rather than in solidtude (I miss my weekly craft nights with Catherine now that she's living in Germany).

Craftersmeetuppic6
Photo by Rae (more photos can be found on her post here)

Every year, around November, I find myself signing up for some sort of holiday ornament/craft swap (200620072009). I always imagine myself having tons of free time to make cute little gifts to swap and it always turns into a time crunch to get everything completed in time. This year, I was determined to have things turn out differently and give myself extra time to prepare.

I brought an ornament project with me to work on for the evening and I spent lots of time with my trusty seam ripper because I could not get sew the ornaments perfectly in line with the template. Trust me...there were lots of very oddly shaped skate boot attempts. Fortunately, I finally got into the groove of things, though, by the end of the night.

Ice Skate Ornaments for Small Fox Ornament Swap
After making a trip to Joann to get Pearl Cotton and pom pom trim, I was able to put the finishing touches on these ornaments (pattern and directions here). These little skates are finished ahead of time (yay!) and I'm hoping they reach their destination of the Second Annual Small Fox Ornament Swap safely.

Ice Skate Ornaments for Small Fox Ornament Swap

Ice Skate Ornaments for Small Fox Ornament Swap

Emily's baby gifts

Monday, July 26, 2010

My college roommate, Emily, is expecting her first kid in September, and I've been planning on things to make for this this baby girl ever since I first found out she was expecting. After all, making baby stuff means getting to work with cute prints and small projects, so it's easy to go a little bit overboard.

bibs and burp rags
...I made some bibs and burp rags. The bibs are backed with white flannel and the burp rags are quilting cotton backed with chenille and are 12"x18". I used the same fabrics that I used for Chikage's baby gifts, and was able to get one bib and one burp rag out of a fat quarter (with a small scrap left over).

nursing cover for Emily
...I sewed a nursing cover (tutorial here). My fabulous male nursing cover model is back in action! I finished 20 minutes before Emily stopped by for a little visit. Thank goodness I had the fabric cut out in advance or I never would have finished it in time.

Baby Quilt for Emily
...and I made this quilt/blanket. The fabric for this is the Porcelina line by Michelle D'Amore from Marcus Fabrics. I actually purchased this before Emily found out that she was having a girl because it totally screamed "Emily's daughter," so I was really happy that she found out she was having a girl so I'd have a chance to use it.

Baby Quilt for Emily
I stalled making the quilt because I was trying to come up with the perfect pattern to use for the quilt. I had toyed with using a raw edge circle applique pattern, but raw edge circles are a bit too unfinished for Emily. I was going to do a simple charm square patchwork, but wanted to step up the patchwork for this. Then I narrowed down the piecing options to a disappearing nine patch or a box in a box, which I ended up using. I went with the box in a box because the dimensions in this tutorial created the right size square for the size backing I was using.

Minkee backing on quilt
For the backing, I used a 32" x 35" piece of minky fabric. This is my first time working with minky and I was afraid that it would pucker or bunch weird when quilting because it is so stretchy. Based on the recommendation of the quilt store employee, I stretched it out on the floor, taped it down and applied a generous amount of spray baste. Then, I laid the patchwork top on the minky and pressed it down with my hands. I quilted it with a walking foot in the same way that I quilt normal quilts with batting and a fabric backing. I tried to minimize the amount of quilting I did, because I didn't want to pull on the backing too much.

Minkee backing on quilt
I made a scrappy patchwork binding with each of the fabrics included in the quilt and attached the binding using this technique.

The finished blanket has a really light drape to it and the backing is so soft and cuddly. Now I want to make a grown up sized blanket with a minky backing like this.

another 365 days around the sun

Sunday, July 25, 2010

new year!
In an attemp to relax and enjoy life more this year I will refrain from creating a list of 29 things to do before I'm 30. It's killing me not to make a list though!

new nook!
This morning Jon treated me with a Nook and chocolate chip waffles. I hadn't ever considered getting an eReader until I realized that with the Nook you can borrow ebooks for free from your local library if they participate in the Overdrive program. I've checked out The Lacuna, Going Bovine, and American Taliban and hopefully I'll be able to finish all three before they're due in 21 days.

new handspun yarn
My friend, Harriet (find her on ravelry here), treated me with this amazing handspun skein of yarn (details here) that was such a fun surprise in the mail. Can you believe she's only been spinning for a few months? We met back in high school band and are very good at enabling each other with supplies crafty hobbies (I didn't think I was a band geek until I realized that I met all of my friends in marching band...busted!). If we follow our track record, she will be weaving and I will be spinning by the end of this year.

new pouch
I treated myself with this adorable pouch made by Sarah at Hip To Piece Squares (picked up at the I-Art Festival in Redford today)

And, the best treat of all was finishing my urgent crafting to do list. That's right, I finished all 5 of my bee blocks, my Paper Bag Challenge Project for the Brighton Modern Quilters meeting tomorrow night, and my Doll Quilt for DQS9. It was a busy sewing day yesterday and this afternoon! I'll be sharing everything later this week.

Spring to Finish - recap

Thursday, June 3, 2010

spring to finish big
Spring to the Finish
Jacquie's Spring to Finish challenge ended on Monday and even though I didn't finish everything on my list, I'm happy with everything that I accomplished.

I was distracted by lots of other projects, so in addition to finishing what I started months ago, I also started a handful of other projects...

1. testing out my new weaving loom (a graduation gift to myself!)
IMG_0269

2. Casting on for an Icelandic sweater and my first time using steeking and colorwork in a garment...
Hela Cardigan in progress

(pattern is Hela cardign and I'm using this speckled white and magenta for the yolk colorwork)
stash for ravelry

3. A May start and finish...this Eternity Scarf made out of Pigeonroof Studios superwash worsted yarn. The yarn is gorgeous and was a joy to work with. It's just too bad that I finished this just in time for 80 degree summertime weather!
eternity scarf
(I should have staggered yarn from each ball in this project as there is a big variation in colors. Fortunately the color change isn't too noticeable when I'm wearing it).

eternity scarf

potholder swap

Friday, May 28, 2010

Malka at a Stich in Dye hosted a potholder swap last month and she paired Susan at iamchickenfoot and I together.

Here's what I made for Susan:
Potholder Swap

Potholder Swap

Potholder Swap
Susan requested red and aqua potholders, so I dug through my stash to find fabrics that fit the bill. I quilted the log cabin and batting together and then sewed the front to the back pillowcase style.
Susan made me this cute hexagon trivet. It matches our kitchen and dishes perfectly.

Potholder Swap
Potholder Swap
Now I just need some fresh flowers to throw into that pitcher.
Potholder Swap
She even sent an adorable little log cabin pin cushion. Isn't it darling?

You can check out the rest of the projects for the swap in the flickr group here.

baby shower

Saturday, May 8, 2010

I've had requests left and right from family and friends to update this blog, so here goes.

I spent this past week recovering from school and crafty commitments and now I'm wondering how in the world I got everything done that I got done while I was in school. It feels really nice to come home and read a book on the couch instead of working on a project. Now I'm wondering if I'll be able to finish my list of projects to finish by the end of May. It's starting to look doubtful.

I spent most of last week throwing a baby shower for my friend, Chikage. She's expecting a baby girl in the next few weeks, so I...
bibs and burp rags
...made some bibs and burp rags. The bibs are backed with white flannel and the burp rags are quilting cotton backed with chenille and are 12"x18".

nursing cover
...sewed a nursing cover (tutorial here)

baby hat
and knitted a Berry Baby hat (ravelry link here).

For the shower, my mom decorated the cutest cake ever...
baby cake
And, she also decorated these sugar cutout cookies for shower gifts. (Jon and I helped, but my mom did all of the detail work on these).

baby cookies
The shower turned out so well and we were able to get everything finished within 2 hours because Chikage kept everyone on track with her super fast/turbo speed gift opening.

Chikage's shower
Now we just have to wait a few more weeks to see the new baby. I can't wait!

mini projects

Friday, April 9, 2010

I will be done with my master's degree next Saturday(!) and I can almost taste the freedom! I've been finishing up little projects here and there lately because that's all that I can handle in my overused brain and overtired body.

Camera Case
Camera CaseCamera Case
I made this a few months ago to fit my new mini camera. I used this tutorial from Sew Mama Sew and made the dimensions a bit smaller for a snug fit. I actually made two cases because I wasn't following directions closely and made it too small. (The octopus print is facing in the right direction on the first case, but not on the final case). My only hint for the pattern is to sew the button on before sewing up the sides - it's a tight fit for a needle if you sew it on last.

Mittens
Mittens
This is from a basic mitten pattern that I found on ravelry. I've been wanting to work my way up to stranded mittens, so I thought I'd start with a basic pattern first to learn the details of mitten knitting. These ended up a little "off." On one mitten, the hand is too long and the thumb is to short. On the other mitten, the thumb is too long and the hand is too short. They fit well if I make a "C" with my hands, so I'm just going to leave them as is. Here's a link to my ravelry project for more details.

Maverick Star Charity Quilt

My dad recruited me to make a twin sized quilt for teen girls living at Children's Village in Detroit (his coworker is collecting handmade quilts). I made this quilt to donate and I recruited the ladies in the Bee Beautiful VQB to help make a second quilt. We all made Maverick Star blocks for the quilt and then I put the quilt top together and dropped it off at the long armer earlier this week. This is my first quilt being outsourced for quilting, so I can't wait to see how it turns out!

I discovered that my Doll Quilt Swap Quilt was included in a mosaic of solid quilts on Whipup today. It was fun to see my quilt included in such an inspiring mosaic. I spotted Amy's Zen Mini Quilt in there too.

Blogger Template created by Just Blog It